在刚刚结束的谷歌IO大会上,谷歌推出了Android Jetpack架构组件,里面包含了Navigation组件,这篇文章我们就来看看这个Navigation的使用。
1、安装Android Studio 3.2
目前最新版本是3.2 CANARY 15,前往https://androidstudio.googleblog.com/下载最新版本。
2、添加项目依赖
- repositories添加google仓库 和classpath
1
2
3
4
5
6
7
8
buildscript {
repositories {
google()
}
dependencies {
classpath "android.arch.navigation:navigation-safe-args-gradle-plugin:1.0.0-alpha01"
}
} - 添加navigation库的依赖
1
2
3
4
5
6
7
8
9
dependencies {
def nav_version = "1.0.0-alpha01"
implementation "android.arch.navigation:navigation-fragment:$nav_version" // use -ktx for Kotlin
implementation "android.arch.navigation:navigation-ui:$nav_version" // use -ktx for Kotlin
// optional - Test helpers
androidTestImplementation "android.arch.navigation:navigation-testing:$nav_version" // use -ktx for Kotlin
}3、创建Navigation
新建一个项目android项目 - 在res目录右键
New->New Resource File,弹出New Resource File的对话框 - 填写
File name比如:nav_graph Resource type选择Navigation- 点击OK
然后会在res下生成一个navigation的目录,里面有我们刚才创建的nav_graph.xml文件,文件内容如下:
1 |
|
是一个navigation的空节点。
打开nav_graph.xml有一个Design和Text的选项卡,跟我们的布局文件很相似
4、使用Navigation
- 新建两个fragment:FragmentA、FragmentB对应布局为fragment_a.xml、fragment_b.xml
- 打开nav_graph.xml,底部选择Design选项卡,点击
 在弹出框中选择刚才建立的fragment_a和fragment_b。或者直接选择
 新建fragment,然后会出现如图的界面:
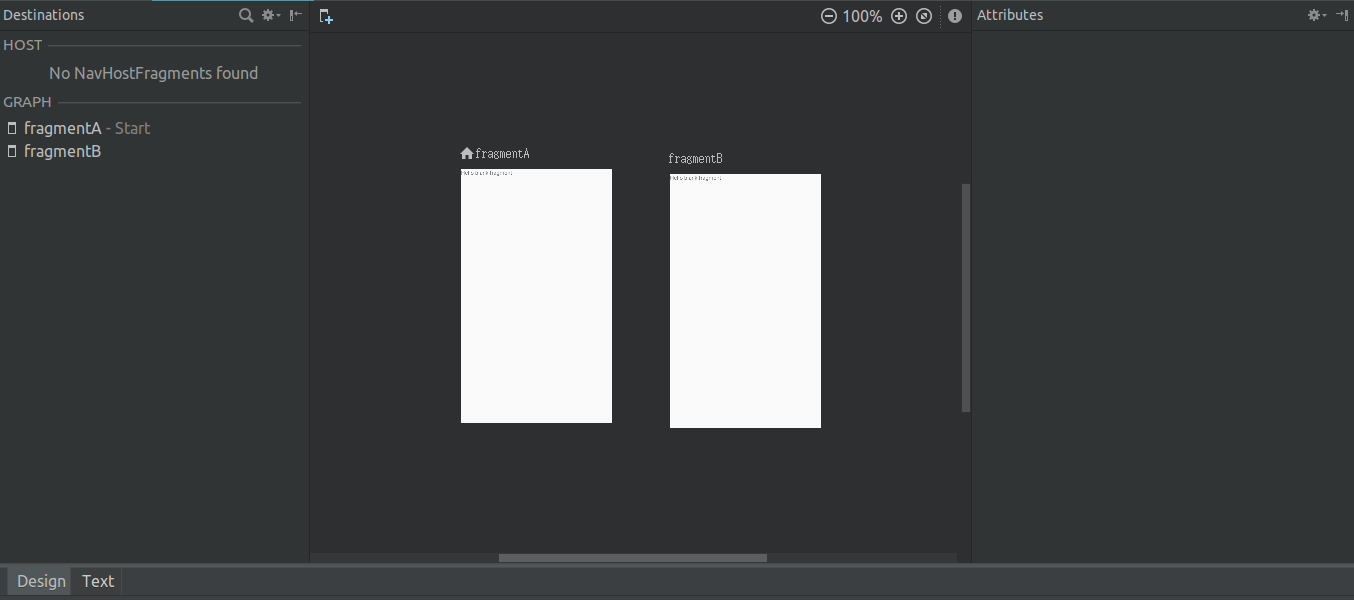
切换到Text下内容如下:在navigation节点里添加了两个fragment,name分别对应我们创建的FragmentA和FragmentB,并添加对应的id1
2
3
4
5
6
7
8
9
10
11
12
13
14
15
16
17
18
19
<navigation xmlns:app="http://schemas.android.com/apk/res-auto"
xmlns:android="http://schemas.android.com/apk/res/android"
xmlns:tools="http://schemas.android.com/tools"
xmlns:tools="http://schemas.android.com/tools"
app:startDestination="@id/fragmentA">
<fragment
android:id="@+id/fragmentA"
android:name="com.halove.jetpackdmeo.FragmentA"
android:label="fragment_a"
tools:layout="@layout/fragment_a" >
</fragment>
<fragment
android:id="@+id/fragmentB"
android:name="com.halove.jetpackdmeo.FragmentB"
android:label="fragment_b"
tools:layout="@layout/fragment_b" />
</navigation> - 在Activity布局里添加NavHostFragment:
1
2
3
4
5
6
7
8
9
10
11
12
13
14
15
16
17
<android.support.constraint.ConstraintLayout xmlns:android="http://schemas.android.com/apk/res/android"
xmlns:app="http://schemas.android.com/apk/res-auto"
xmlns:tools="http://schemas.android.com/tools"
android:layout_width="match_parent"
android:layout_height="match_parent"
tools:context=".MainActivity">
<fragment
android:id="@+id/my_nav_host_fragment"
android:name="androidx.navigation.fragment.NavHostFragment"
android:layout_width="match_parent"
android:layout_height="match_parent"
app:defaultNavHost="true"
app:navGraph="@navigation/nav_graph" />
</android.support.constraint.ConstraintLayout>app:defaultNavHost="true"是拦截返回键,即将返回交给NavHostFragment处理。app:navGraph="@navigation/nav_graph"将NavHostFragment跟我们刚才创建的navigation关联。
然后重新打开nav_graph.xml会发现在HOST下面就会显示我们关联的activity: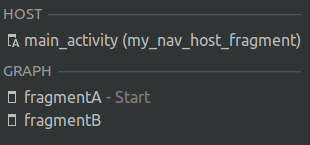
- 添加导航连接
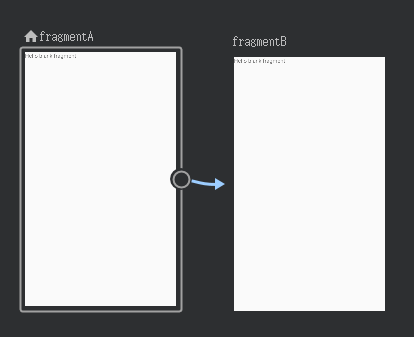
左键按住fragment右侧中间的圆圈然后拖动到要导航的fragment然后松手
切换到Text下,发现在fragment标签里添加了一个action节点:action添加了一个id和destination,destination就是我们要导航到的fragment。1
2
3
4
5
6
7
8
9
10
11
12
13
14
15
16
17
18
19
20
21
22
<navigation xmlns:app="http://schemas.android.com/apk/res-auto"
xmlns:android="http://schemas.android.com/apk/res/android"
xmlns:tools="http://schemas.android.com/tools"
xmlns:tools="http://schemas.android.com/tools"
app:startDestination="@id/fragmentA">
<fragment
android:id="@+id/fragmentA"
android:name="com.halove.jetpackdmeo.FragmentA"
android:label="fragment_a"
tools:layout="@layout/fragment_a" >
<action
android:id="@+id/action_fragmentA_to_fragmentB"
app:destination="@id/fragmentB" />
</fragment>
<fragment
android:id="@+id/fragmentB"
android:name="com.halove.jetpackdmeo.FragmentB"
android:label="fragment_b"
tools:layout="@layout/fragment_b" />
</navigation>
activity中不需要做任何操作,只需要设置布局即可:
1 | class MainActivity : AppCompatActivity() { |
在FragmentA中布局中添加一个button,点击跳转到FragmentB:
1 | override fun onActivityCreated(savedInstanceState: Bundle?) { |
使用很简单,调用Navigation的findNavController方法找到NavController,findNavController还有其他参数的方法大家可以自己试试,然后调用navigate方法,参数就是nav_graph.xml里action的id。或者直接使用createNavigateOnClickListener
效果如图:
按返回键会回退到上一个fragment,也可以调用NavController的popBackStack进行回退
接下来看看怎么传递参数。
navigate有好几个方法,如下: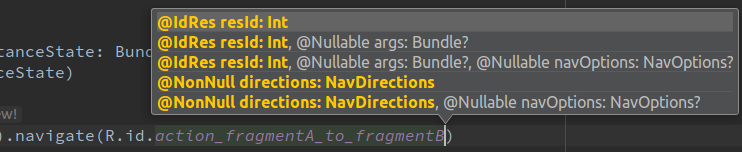
有个带bundle参数的,可以用这个传递参数:
1 | val bundle = Bundle() |
也可以在navigation的xml的fragment的action里添加argument标签,然后使用生成的对应的Agrs或者Directions来传递参数,需要在build.gradle中添加apply plugin: 'androidx.navigation.safeargs'
1 | <fragment |
使用:
1 | //使用FragmentBArgs |
FragmentBArgs和FragmentADirections都是自动生成的,FragmentBArgs是根据fragment节点下的argument节点生成的,FragmentADirections是根据action生成的
- 转场动画
可以在action上添加转场动画,如下:动画的代码写法跟原来activity的动画是一样的,这里就不多说了。1
2
3
4
5
6
7
8
9
10
11
12
13
14
15
16
17
18
19
20
21
22
23
24
25
26
27
<navigation xmlns:app="http://schemas.android.com/apk/res-auto"
xmlns:android="http://schemas.android.com/apk/res/android"
xmlns:tools="http://schemas.android.com/tools"
app:startDestination="@id/fragmentA">
<fragment
android:id="@+id/fragmentA"
android:name="com.halove.jetpackdmeo.FragmentA"
android:label="fragment_a"
tools:layout="@layout/fragment_a" >
<action
android:id="@+id/action_fragmentA_to_fragmentB"
app:destination="@id/fragmentB"
app:enterAnim="@anim/slide_in_right"
app:exitAnim="@anim/slide_out_left"
app:popEnterAnim="@anim/slide_in_left"
app:popExitAnim="@anim/slide_out_right"/>
</fragment>
<fragment
    android:id="@+id/fragmentB"
    android:name="com.halove.jetpackdmeo.FragmentB"
    android:label="fragment_b"
    tools:layout="@layout/fragment_b" >
    <argument android:name="text" android:defaultValue="Hello" app:type="string"/>
</fragment>
</navigation> - 深层链接 deep-link
使用 deep-link可以创建深层链接,类似activity的自定义URL使用Scheme方式来跳转,可以直接跳转到指定Fragment上面我们给FragmentB添加了一个deepLink,然后在manifest给activity添加nav-graph:1
2
3
4
5
6
7
8
9
10
11
12
13
14
15
16
17
18
19
20
21
22
23
24
25
26
27
28
<navigation xmlns:app="http://schemas.android.com/apk/res-auto"
xmlns:android="http://schemas.android.com/apk/res/android"
xmlns:tools="http://schemas.android.com/tools"
app:startDestination="@id/fragmentA">
<fragment
android:id="@+id/fragmentA"
android:name="com.halove.jetpackdmeo.FragmentA"
android:label="fragment_a"
tools:layout="@layout/fragment_a" >
<action
android:id="@+id/action_fragmentA_to_fragmentB"
app:destination="@id/fragmentB"
app:enterAnim="@anim/slide_in_right"
app:exitAnim="@anim/slide_out_left"
app:popEnterAnim="@anim/slide_in_left"
app:popExitAnim="@anim/slide_out_right"/>
</fragment>
<fragment
android:id="@+id/fragmentB"
android:name="com.halove.jetpackdmeo.FragmentB"
android:label="fragment_b"
tools:layout="@layout/fragment_b" >
<argument android:name="text" android:defaultValue="Hello" app:type="string"/>
<deepLink app:uri="www.loongwind.com/test"/>
</fragment>
</navigation>Android Studio 3.2及以上可以直接添加nav-graph节点,value就是我们的navigation,3.2以下的得自己写intent-filter,如下:1
2
3
4
5
6
7
8<activity android:name=".MainActivity">
<intent-filter>
<action android:name="android.intent.action.MAIN" />
<category android:name="android.intent.category.LAUNCHER" />
</intent-filter>
<nav-graph android:value="@navigation/nav_graph" />
</activity>代码里跳转:1
2
3
4
5
6
7
8
9<intent-filter>
<action android:name="android.intent.action.VIEW"/>
<category android:name="android.intent.category.DEFAULT"/>
<category android:name="android.intent.category.BROWSABLE"/>
<data android:scheme="https"/>
<data android:scheme="http"/>
<data android:host="www.loongwind.com"/>
<data android:pathPrefix="/test"/>
</intent-filter>这样跳转到我们的Activity就会直接显示FragmentB界面。1
2
3val data = Uri.parse("http://www.loongwind.com/test")
val intent = Intent(Intent.ACTION_VIEW, data)
startActivity(intent)
好了到此我们的Navigation初探就到此结束了,更多请参考Google官方文档:Implement navigation